Over The Top Mommy

Printables

Take Your Birthday Party to Blink, Inc. For a Fun Photo Shoot

I was invited as a guest of Blink, Inc. for a photo session in order to write this post. All opinions are 100% my own. 

As a party planning mom, I get excited when my daughter’s birthday rolls around each year because it’s another opportunity to plan a special party for her. It’s become a bit more challenging though as she’s gotten older. Gone are the days of having a big house party with characters or a bounce house. blink-inc-cardsblink-inc-birthday-button
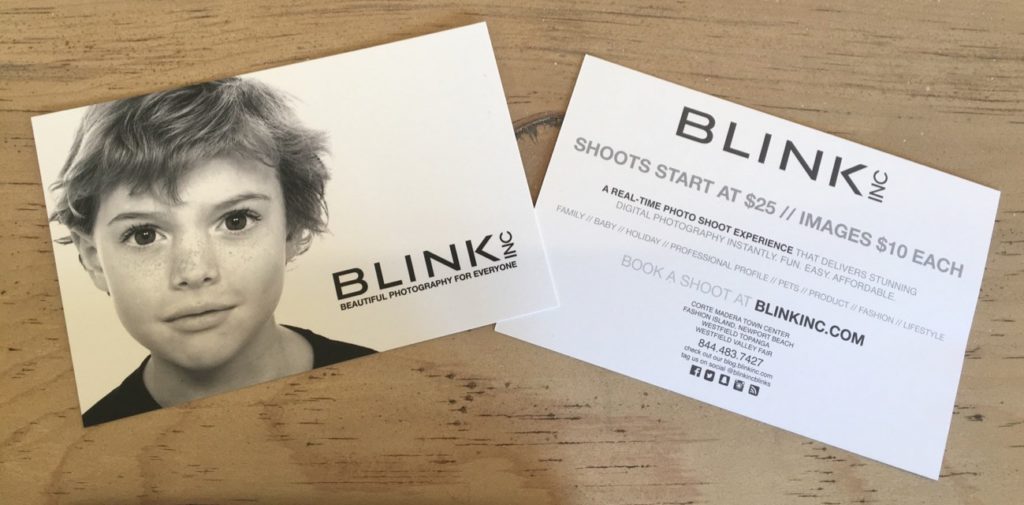
This year my daughter just wanted a “Girls Day Out” at the mall with her friends. I think they’re at the age where they want to be out and be seen. She requested lunch and shopping and “just hanging out”. I thought of something super fun to add to her day….I booked a BFF birthday photo session for the girls at Blink, Inc,! (She absolutely loved it when we visited last year.) She was ecstatic when I told her about the addition to our plans for the day!blink-inc-poses
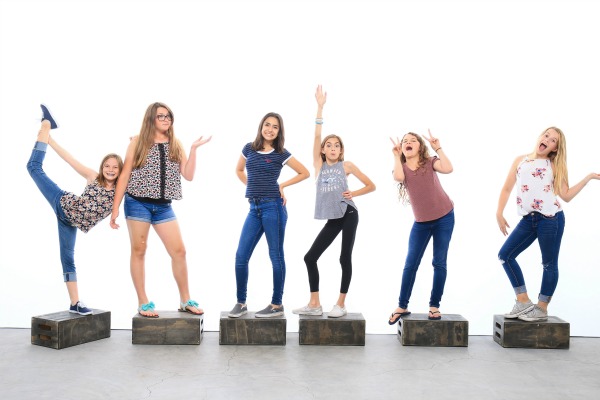
Blink, Inc. is a photo studio staffed with professional photographers that are ready to photograph you the moment you walk in. It was so easy to make this fit in with our party schedule, you just go online to their site and choose a time and date at the location that works best for you, and book an appointment to go into their studio.
blink-inc-birthday-hatsBlink, Inc.studio is already set up with an all-white, blank backdrop, giving you images that look and feel like a professional, editorial fashion shoot. The lighting is set up to make everyone look their best! (They even flashed out MY wrinkles!)blink-inc-us
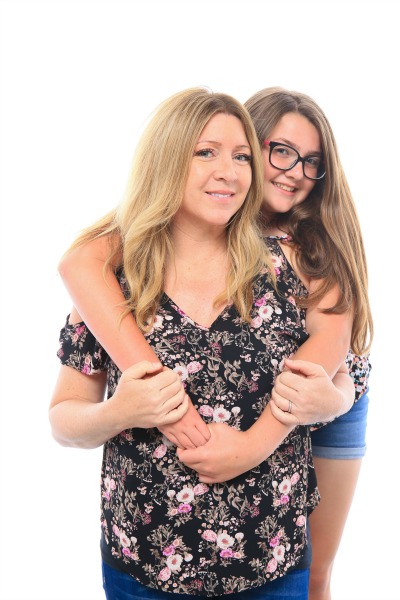
The photographers at the studio are experienced and will work with you ,not only to make it a fun experience but also to assure you get the images you envisioned in your head. Our photographer talked with us a little bit before we started and we showed her some of the props we brought for the shoot and gave her ideas of what I was looking for.blink-inc-confetti
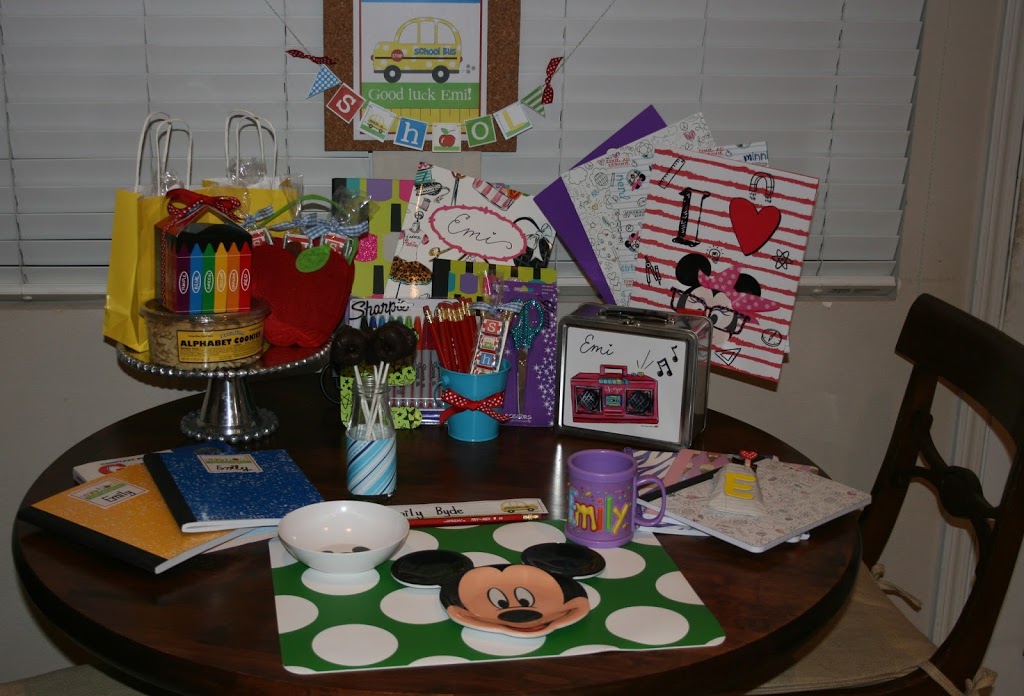
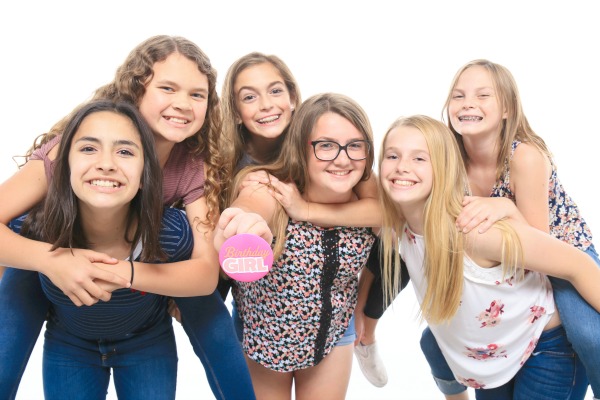
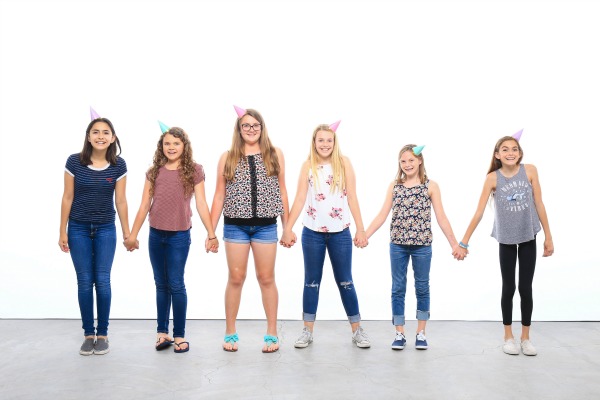
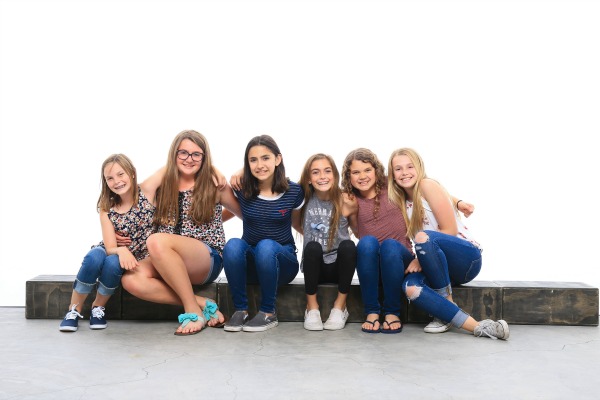
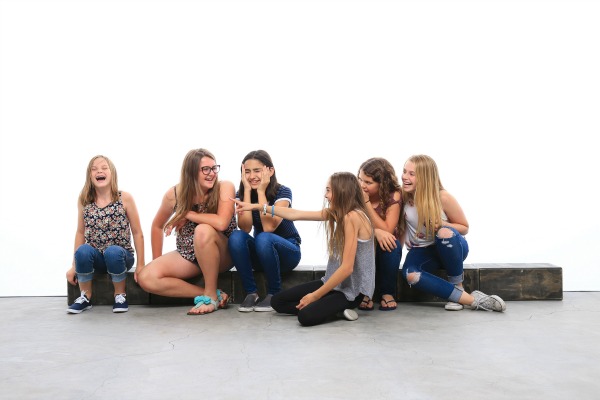
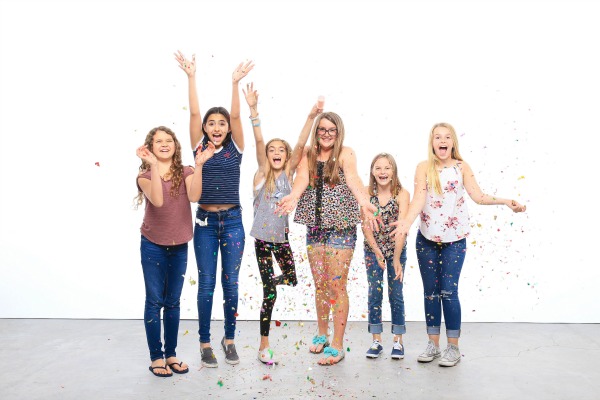
You’ll want to come into the studio with an idea of what you’re going to do because shoots go by very quickly. We brought tiny party hats with us, a “Birthday Girl” button, and some confetti, to use as props in some of the pictures. Our photographer, got a lot of cute shots though, most without props. I love that the girls were just dressed as their regular, everyday tween selves because their littler personalities really showed in the photos.blink-inc-circle

blink-inc-friendsblink-inc-laughing-with-you
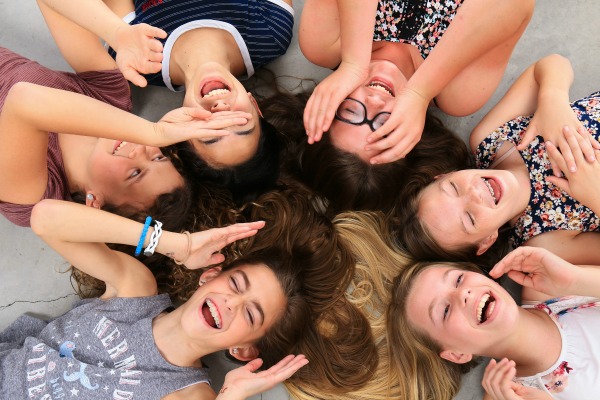
Sessions at Blink, Inc  can be scheduled for 10, 20, 30 minutes, or even longer, and start at just $25 for a 10 minute session. You’re able to see your photos as they’re shot, because Blink, Inc. offers a real-time delivery system. Pricing for images begins at $10/image with the option to purchase the entire shoot at a great “Buy All” price. Your images are delivered  almost immediately to your computer or mobile device so you can view, download to share online and even print at home.blink-inc-jump
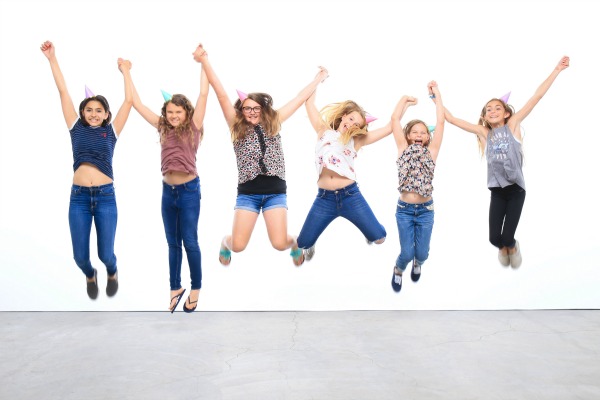
Walk-ins are welcome but reservations are always encouraged at Blink, Inc.. To learn more  about the different types of sessions you can shoot at Blink, Inc. or to reserve your own in-studio appointment, please visit http://www.blinkinc.com.

A very special thank you to our favorite Blink, Inc. photographer at the Fashion Island location, Morgan! 

DIY Valentine’s Day Shirts

After making family shirts for Thanksgiving Day and some Christmas Pj tops, my daughter insisted I now make her a Valentine shirt! She is in love with two of the newest Valentine printable collections by Lauren McKinsey, Puppy Love and Purr-fect Love, so we designed a fabric transfer on the Avery site using some of the clip art included with these collections. I cannot tell you how easy these are to do. You literally go online to the Avery site, enter your product number, (we used #8938, for light fabrics) and then you have an option to use their online template to design whatever you want.

After you have perfected your design, just print it out, using the special fabric transfers paper in your printer. After printing, trim around the design (don’t trim too close) and place face down on your image where you want it to be.
*This is the important part: Read their directions, even watch their tutorial, about HOW to best iron the image to your shirt. This part is VERY important. I’d by lying if I didn’t admit to having had a couple of shirts before that had to be thrown out, after I completely messed them up.
I LOVE how her shirt turned out so much, that I’m definitely making one for myself too! Aside from Christmas, I think Valentine’s Day is my other favorite holiday!
To see all of Lauren McKinsey’s Valentine’s printable collections, click here.

Simple Cheer Team Gifts (Or For ANY Team Sport) + FREE Printable Tags

This is not a sponsored post. 

It’s the beginning of the competitive cheer season and I’ve been trying to come up with something simple but cute to give to each of the girls on my daughter’s team. (including her coaches). Although Pinterest has some great ideas and is usually where I head straight to for ideas, I wanted to do something a little different. chalk-boxx

I’m a big supporter of small business and I try to “Shop Small” whenever possible. One of my many favorite shops to buy from is called Chalk Boxx! I originally found her on Instagram because she’s a teacher too. Her shop is a non-subsciption company that delivers specialty boxes, totes, and other fun goodies to teachers. Well, I hit her up as a “cheer mom” for this particular order.chalk-boxx-order
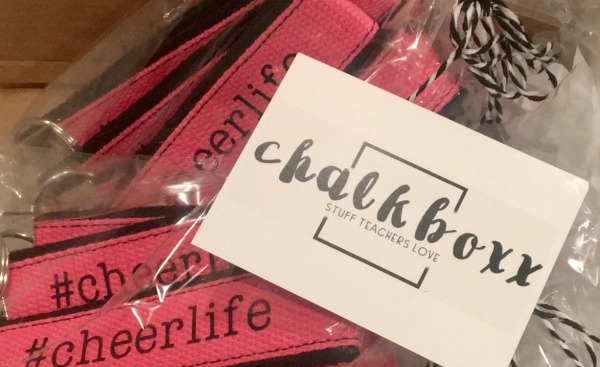
How adorable are these custom #CHEERLIFE keychains I had her make for my girls? I’m in love with them! You can pretty much customize these with anything you’d like them to say.cheer-life-keychains
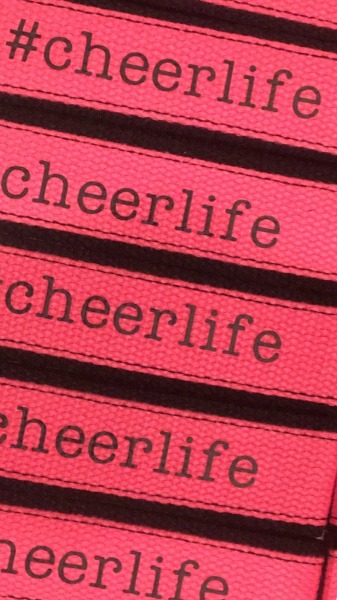
I wanted to attach some kind of encouraging, positive tag to the gifts as well, so I whipped up this little printable that says “The KEY to an amazing cheer season is TEAMWORK!” the-key-to-an-amazing-season-is-teamwork
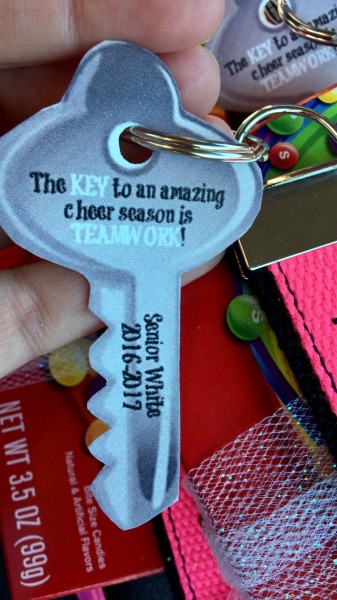
I also made a generic version so you can print it out here for free. I recommend printing them out on white cardstock.generic-key 
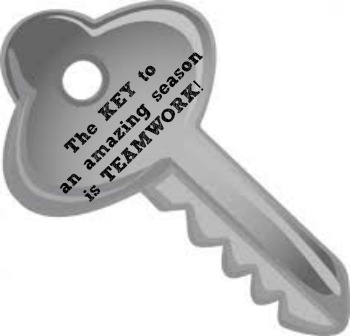
If you have time, you can even laminate them. I punched a hole in each one and stuck it on the actual keychain.cheer-gifts-with-skittles
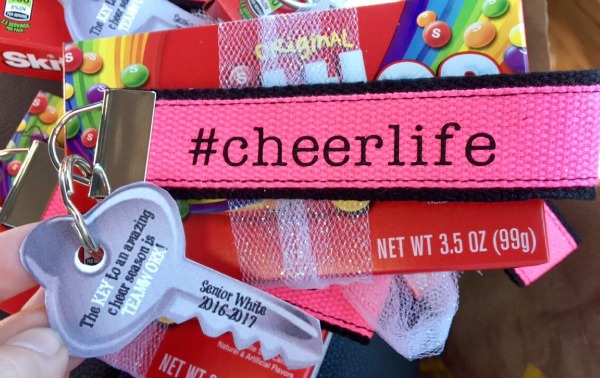
I grabbed theater-size boxes of Skittles and tied each keychain onto a box, using sparkly white tulle! Simple. Cute. Unique. Exactly what I wanted! connect-with-chalk-boxx

Chalk Boxx logo is property of Chalk Boxx. 

Cute Alternatives to Edible Halloween “Treats” for Kids + Plus FREE Printable Tags

I was provided with products in order to facilitate this post. All opinions are 100% my own. 

It’s Halloween season and I get really excited about all of the fun happenings this time of year. Parties, crafts, and trick-or-treating are just some of my favorites.its-halloween-time
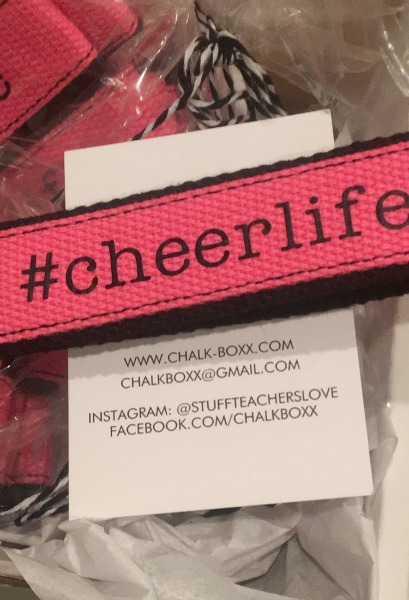
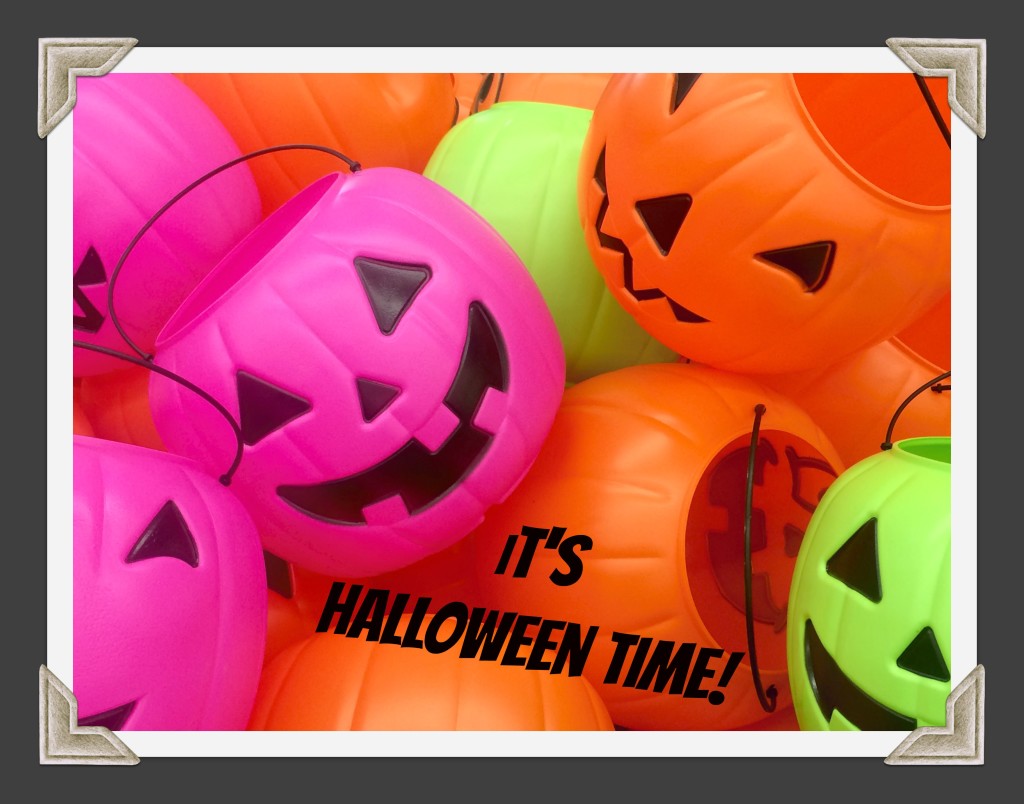
I’m always on the lookout for alternatives to edible Halloween “treats” to give to my students. With all of the other Halloween activities going on, kids get plenty of sugar already. I know other moms appreciate it when their children receive non-sugary treats, especially with general concerns about sugar intake and food allergiesHalloween-treats-candyI found so many cute things to use on Oriental Trading Company’s site. Have you seen their Halloween section yet? From Halloween toys and games, thematic crafts, and party decorations to Halloween costumes, they have a great Halloween selection. They do have candy on their site as well, which I also order for other things.halloween-plush
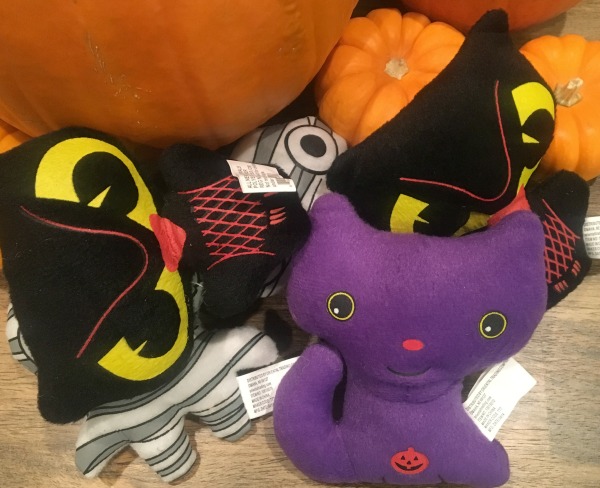
It’s hard for anyone to resist stuffed animals, so I ordered a bunch of Plush Halloween Mini Characters for my students, which come in owl, cat, and mummy. I love that they’re Halloween-y but not scary. They’ll be perfect for kids to hug or hang onto. I know my own daughter used to have plush with her when she was afraid of the dark. I also think I’ll let my students read with their animals in the classroom if they choose to do so.halloween-plush-for-gifts 
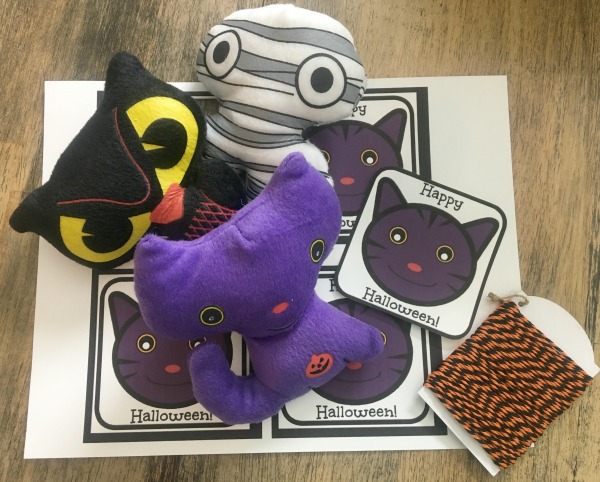
I attached a “Happy Halloween” tag to each one using a printable I made, and used orange and black bakers twine to tie it on.happy-halloween-tag
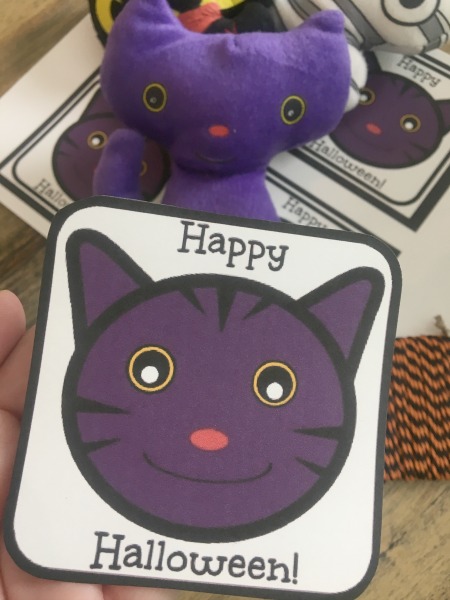
You can download my FREE printable here. As always, I recommend printing it out on white cardstock.halloween-treat-alternatives-for-kids
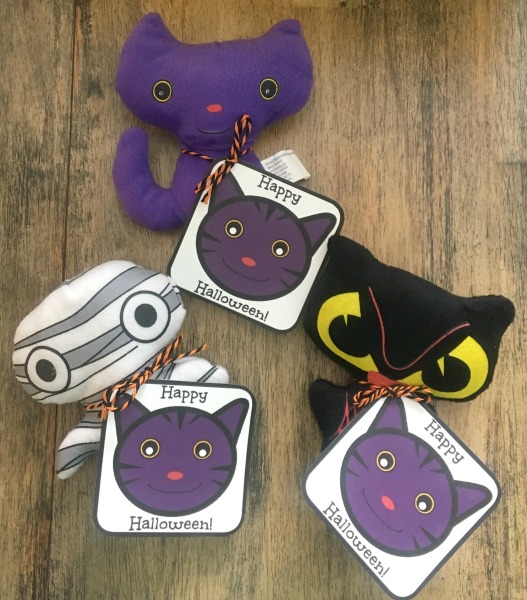
I cannot wait to to give these to my students. They are going to be so excited! Do you have alternatives to sweets that you like to give to kids at Halloween time?


DIY Easy Halloween Treat Bags and Tic-Tac-Toe Game! FREE Printables, Too! (Perfect For Busy Moms!)

Happy-Halloween-tic-tac-toe-coverHalloween is such a fun time of year, not only for kids but for moms and teachers, too! I like send something to school with my daughter on Halloween to pass out to her classmates. This year, I made cute little “Happy Halloween Tic-Tac-Toe” treat bags and I’ll be sharing my free printable with you.

Halloween-tic-tac-toeThere are a variety of different treats you can pair this with as the game pieces, including some non-food items. Some ideas might include small Halloween erasers, cubes, pennies and nickels, small candies, Goldfish crackers, pretzels, etc.

Halloween-treats-candyI think you get the idea. You just need to make sure to include 2 different types of treats in each kit so the kids can play Tic-Tac-Toe. I chose candy corn and candy pumpkins. They are 2 of my own favorite Halloween treats. The good thing about these treat bags is that they are very simple to put together, especially at the last minute. I’m all about the last minute! Happy-Halloween-tic-tac-toe-pic

theres-nothing-like-the-last-minute

Here’s what you’ll need to put together your own treat bags:

  • 2 different types of small treats
  • small bags (even plastic sandwich bags would work)
  • tape or Halloween stickers (to seal the bags)
  • one “Happy Halloween Tic-Tac-Toe” game board per bag (it’s a free printable)

Happy-Halloween-Tic-Tac-Toe-1Assembling your treat bags:

  1. Print out one game board per child. (Click here to print.) I prefer to print mine on white cardstock. Also, they’re set up to print out 2 per sheet. You can adjust to print out 4 per sheet. (check your own computer’s settings). You’ll need scissors or a paper cutter to cut that out.
  2. Place one game board and at least 10 of each treat in each bag.
  3. Seal treat bags with tape or a cute sticker.
  4. If you want to be extra detailed, print out a Happy Halloween tag for each one, write your child’s name on, and attach to each bag. Print tags here and cut out each circle. Happy-Halloween-Tag

Well I hope you can use my printables! Don’t worry, we most likely don’t have children who attend the same school so I’m guessing you’ll be the only one who shows up with the cutest Halloween favor bags in the class! Oh, and feel free to share with others! Happy Halloween!

Who are YOU going to BOO This Year? I’m BOO’ing the Teachers! (Plus “Monster” Cookies Recipe) #BOOItForward

This shop has been compensated by Collective Bias, Inc. and its advertiser. All opinions are mine alone. #BOOItForward #CollectiveBias

who-are-you-booing-this-year

I absolutely LOVE this time of year. I can’t say that the weather cools down much here in Southern California but you DO start to see pumpkins and Halloween decorations all around. It’s one of my favorite holidays of the year and I get so excited to kick off the Halloween season by BOO’ing people at the beginning of October.

its-halloween-timeIf you aren’t familiar with the modern-day tradition of BOO’ing, it’s really fun and easy to do. You just put together a little anonymous Halloween surprise for someone and deliver it. The surprise usually consists of some type of treats in a cute Halloween bucket, basket, or even gift bag. You also include a BOO sign and instructions so that whoever you BOO, can BOO someone too! (Hey, that rhymes!)

all-I-needI found all of the items I needed for my BOO’ing at Walmart. On the Seasonal aisle, I found giant Mars Chocolate Mix Fun Size bag of assorted candies, including M&M’s®, TWIX®, and SNICKERS®.

found-at-walmartOn the soft drinks aisle, I grabbed a couple of 6-packs of special Halloween “Mini Monster” cans of Sunkist® and 7UP®. They’re adorable with little monsters on them! l also found the ingredients I needed to make my “Monster” Cookies. (It’s a special Halloween cookie recipe we make every year using M&M’s® and TWIX®).

I-love-MandMs

cut-up-TWIXIn past years, we’ve BOO’d neighbors on our street, friends who live close by, and even relatives who live in our same town. This year I think I’ll do some BOO’ing at my school. I teach first grade and I know of some teachers who would appreciate a little BOO surprise on their desk one morning. ( I know I would!) Teachers are really easy to please and love almost anything.

teachers-love-treatsI decided to make little BOO kits with some snacks and mini cans that my teacher friends could enjoy during their break time. I also baked up a fresh batch of my “Monster” Cookies to include in each BOO’ing kit! (see below for recipe)

put-together-a-BOOing-kit

Here are the items I used for my BOO’ing kits: 

  • assorted chocolates from 
  • “Mini Monster” cans of 7UP® & Sunkist®
  • black and white polka dotted paper straws 
  • black and white striped washi tape
  • googly eyes
  • regular tape
  • decorative black and orange plastic patterned popcorn boxes
  • cellophane bags
  • decorative ribbon
  • Mouthwatering “Monster” Cookies monster-cookies

Since I purchased Halloween “mini monster” cans of Sunkist® and 7UP® for my BOO’ing kits, I cut down some cute paper straws a little and used washi tape to attach them to the cans. It makes an adorable presentation.

mini-cans-sunkistI also used some big googly eyes on the popcorn boxes to make them look a little cuter. You could use glue or even tape to attach them.

box-with-eyesAfter I baked my cookies and let them cool, I stacked up a few and put them into a cellophane bag and tied it with a festive Halloween ribbon. My “Monster” Cookies are pretty big so only a few fit in each bag.

fill-with-candiesIt was fun to put the BOO’ing kits together. First, I filled the bottom of each popcorn box with the candies. Then, I placed a Halloween “Mini Monster” can inside, then I filled it to the top with more candy. I set the tied up cellophane bag of cookies on top of the box (I told you they were giant cookies!) and placed the “We’ve Been BOO’d” printables” next to each surprise on each of the teachers’ desks!

as-giddy-as-a-first-graderI don’t know about you, but I get as giddy as a first grader when it comes to leaving surprises like this! I couldn’t wait for them to discover they’d been BOO’d!

BOO-printableTo make BOO’ing easier, MARS has provided a free “We’ve Been BOO’d” sign that you can print out and use with your BOO’ing kit. Just click here to download yours and print.

After you print out the pages: 

  1. Cut out the “We’ve been BOO’d” sign.
  2. Fold the “You’ve been BOO’d” greeting card (page 2) and tape openings together.
  3. Include the card (and sign if you don’t want to remain anonymous) when you BOO someone! 

boo-the-teachersLook how cute these turned out! It’s so much fun to BOO at work! Having a “We’ve Been BOO’d” sign on the classroom door is really fun, too!

so-fun-on-the-classroom-door

monster-cookies-signHere’s my recipe for “Monster” Cookies. It’s fairly simple to prepare and the cookies turn out delicious every time.

“Monster” Cookie Ingredients:

  • 2 1/4 cups all-purpose flour
  • 3/4 cup granulated sugar
  • 3/4 cup brown sugar, packed
  • 1 cup (2 sticks) butter, softened
  • 2 large eggs
  • 1 tsp. salt
  • 1 tsp. baking soda
  • 1 tsp. vanilla extract
  • 10-12 Fun Size Twix Bars, chopped
  • 8-10 Fun Size packs of M&M’s®
  •  1 package of candy eyeballs monster-eyes

“Monster” Cookie Preparation: 

  1. Preheat the oven to 375 degrees.
  2. Line your baking sheet with parchment paper. (This is my best kept baking secret.)
  3. Chop up approximately 1/2 cup Twix bars and set aside.
  4. Measure out 1/2 cup M&M’s and also set aside.
  5. In a small bowl, combine the flour, baking soda, and salt and set aside.
  6. In a large bowl, beat the butter, granulated and brown sugars, and vanilla extract until creamy. Add the eggs, one at a time, beating them in after each one is added. beat-the-ingredients
  7. Beat in the flour mixture gradually.
  8. Mix in the Twix and M&Ms with a wooden spoon. add-the-candies
  9. Spoon generous portions of the cookie dough onto the parchment paper-covered baking sheet. (They’re supposed to be pretty giant.)
  10. Bake 5 minutes.
  11. Remove from the oven and add a few more pieces of each candy plus 1-3 candy eyeballs on the top of each cookie. This will help them to bake while staying visible in the cookie.
  12. Bake 3-5 more minutes or until golden brown.
  13. Remove from the oven and allow to cool before serving.

Right now, you can save $2.00 on on ONE (1) 6pk 8oz Cans or TWO (2) 2L and 2 bags of Mars® Candy at Walmart. Click here for coupons. Also, don’t forget to enter the Boo It Forward Sweepstakes! #booitforwardsweepstakes

So are you ready to go out and BOO someone now? I hope I’ve inspired you to “BOO It Forward”! 

now-its-your-turn

Will You Be My PFF? Let’s Be PEEPS®Friends Forever This Valentine’s Day!

Will-you-be-my-PFFValentine’s Day is just around the corner! It’s my most favorite holiday! This year I got a head start on my Valentine’s treat preparation and stocked up on PEEPS® Valentine’s Day products. You can’t go wrong with   PEEPS® because they’re irresistible and everyone loves them!

FullSizeRender (78)As you can see, our Valentine’s Day this year is going to be all about the PEEPS®! They come in a variety of shapes and seasonally-inspired flavors to satisfy your Valentine’s sweet tooth.

This year’s PEEPS® Valentine’s offerings include:

  • Pink Marshmallow Chicks
  • Pink Marshmallow Bunnies
  • Chocolate Dipped Strawberry Crème Flavored Chicks
  • Marshmallow Hearts
  • Cherries Drizzled and Dipped in Chocolate
  • Chocolate Covered Raspberry Flavored Hearts
  • Strawberry Crème Flavored Marshmallow Hearts
  • Vanilla Crème Flavored Marshmallow Hearts

In addition to serving as a savory token of affection, PEEPS® Valentine’s Day products are also fun to incorporate into snacks at home and Valentine treats for others. I put together a couple of cute printables to add to some of the PEEPS®Valentine treats I’ll be sending to school with my daughter, for her classmates and teachers!

in-case-of-emergencyI LOVE these Vanilla Creme PEEPS®Marshmallow Hearts! I made this little “In Case of Emergency: Break Seal!” labels to stick onto this package. I think I’ll give these to my daughter’s teacher. Being a teacher, I’m SURE there are times she has an “emergency” and will be able to utilize these properly, don’t you think?  It’ll be as easy as breaking open the package seal and enjoying them!

youre-one-of-my-favorite-peepsI made these little heart “You’re one of my favorite Peeps!” printables to attach to these 3-packs of new Strawberry Crème Flavored Milk Chocolate Dipped PEEPS®. I know the instructional assistants for my daughter’s class are going to love them!

will-you-be-my-PFFI also made these “Will you be my PFF?” tags to attach onto a single pack of the new flavor, Milk Chocolate Covered Raspberry flavor! PFF” stands for Peeps Friends Forever!

I cannot wait for Valentine’s Day to get here! Do YOU love it as much as I do? What’s YOUR favorite part about Valentine’s Day?

Try one or all of the seasonal varieties and express your PEEPSONALITY® by incorporating them into your favorite Valentine-inspired creations! PEEPS® Valentine’s treats can be found nationwide at grocery and drug stores, PEEPS & Company retail stores or at http://www.marshmallowpeeps.com.

I was provided with some PEEPS® Valentine’s treats in order to write my feature. No other compensation was received. All opinions are 100% my own. 

Happy New Year 2014 Printables by Lauren McKinsey

I cannot believe Christmas is already over and now we’re quickly moving onto celebrating the arrival of the new year! I can’t resist the adorable printable collections by Lauren McKinsey! Look at her newest one….Happy New Year 2014! It has hanging gift tags, circle tags (in 3 different sizes), drink wraps, straw flags, tent cards, signs, cards to write, plastic bag foldover labels, miniature candy bar wrappers, Hershey’s kiss stickers, push pop wraps and kids coloring sheets! I love the colors and the designs of this entire collection! I also love how she used Sixlets from Sweetworks.  Below are just some of the pics. Click here to find the entire collection.

You can get a free printable from her collection by clicking here!
I can already tell that 2014 is going to be a great year! Cheers!

Getting Ready for Back to School

I feel like summer has just flown by and little by little I’ve been getting ready to go back to school.
For me, there are 2 kinds of “going back to school”. First, I have to go back to my own first grade classroom. A couple of weeks after that, I have to get ready for Emi’s first day of school!

The first day of school for Emi is kind of a big deal around here. (I’m sure no one is surprised, right?)
I start “hoarding” things for her 1st day of school breakfast, as early as June! I stick them in cupboards, closets, and in the back of my car! I don’t think I even sleep the night before her first day because I’m so busy setting everything up just perfectly, like I’m throwing some big party or something! I’m pretty sure Emi is just excited to see donuts sitting at the table each year.

Earlier today, I was looking back through my pictures from what I did last year and I just can’t believe it’s been almost a year since Emi started 2nd grade!

Whenever there’s a special occasion or a holiday, I love to decorate with printables by Lauren McKinsey! She always has the most adorable collections, some of which you can even personalize before you print! Last year, I was able to use this particular collection for both this table AND in my own classroom!
Check out her collections here: http://www.LaurenMcKinsey.com
This was some of the back to school swag from last year.
I was in LOVE with this lunchbox by Timree, which actually has a chalkboard inside to write a note in.
The personalized folder is also part of Timree’s school supply collection.
You can check out more of her stuff at: http://www.timree.com
These were little pretzel bags filled with Hershey’s Nuggets that were each wrapped with a printable, also from that collection. The best part about assembling these the night before, was that there was no one else around to count how many I’d eaten!
 
Always remember to send something for your child’s teacher on the first day.
Emi likes to bring something for her new teacher and something for all of the former ones.
(Teachers appreciate that kind of gesture, even if it’s just something small.)
I feel like I’m going to have a hard time outdoing myself this year
after looking over what I did last year!
 Guess we’ll find out in a couple of weeks!