This is not a sponsored post. All opinions are my own.
Calling all LEGO fans and moms looking for a cute costume idea that’s easy to make! Last year, we put together these LEGO Brick costumes on very short notice, to wear to LEGOLAND California’s Brick or Treat night.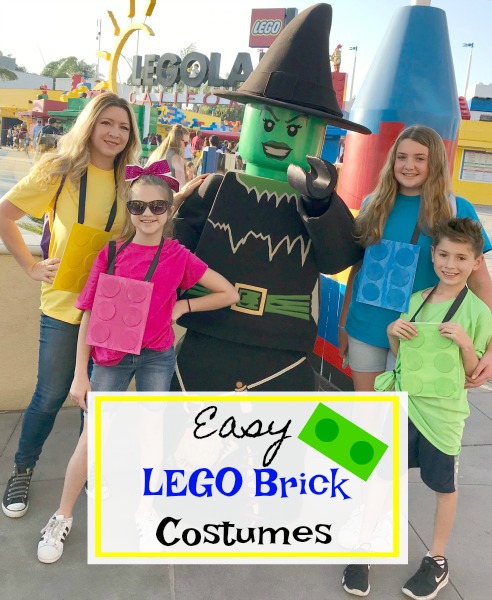 Since it’s an event in the park and the kids still want to go on rides and wear a costume, I found these very easy to wear and also to take off and put on quickly for rides, but still look cute. We got a ton of compliments and it was fun for our whole family to have matching costumes.
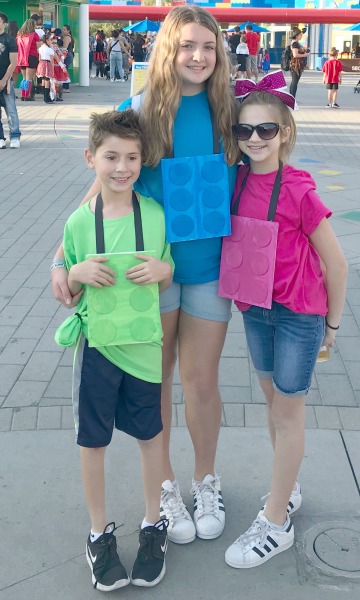 To make these LEGO Brick costumes you’ll need:
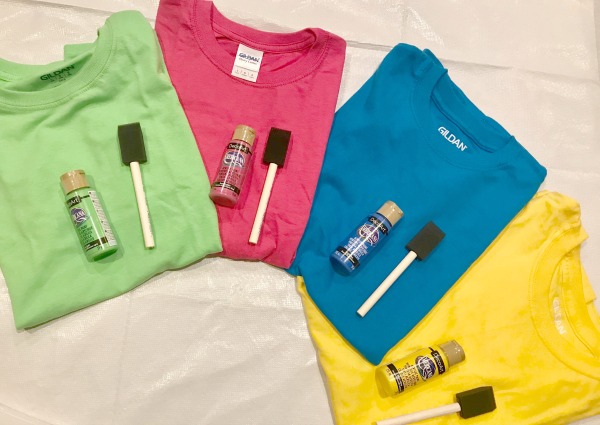
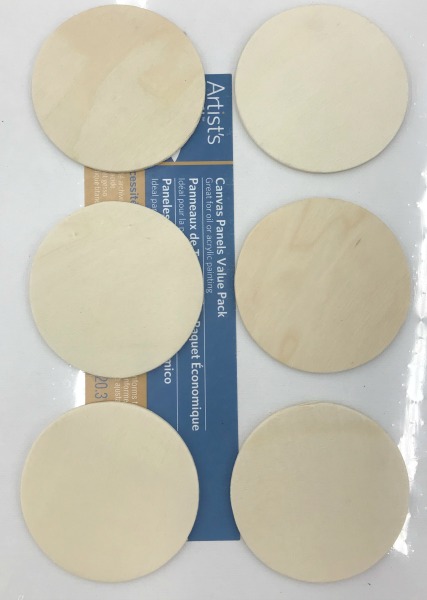
- A thin wood rectangle (1 for each costume)
- 6 thin wood circles (for each costume)
- spongy paintbrushes
- acrylic paint
- craft wood glue
- mini glue gun with glue sticks
- 1/2″-1″ wide ribbon
- a coordinating color of t-shirt to match your “brick”
- newspaper or paper, for painting on
- scissors
 Directions for the costume:
- Use a generous amount of acrylic paint to both the canvas and the 6 wooden circles. (Make sure your painting surface is covered.) Allow to dry overnight.
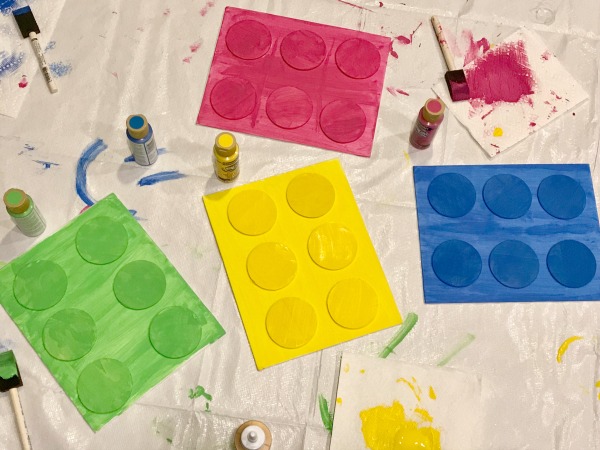
- Lay circles onto painted canvas to see where you want to glue them. Use your favorite craft wood glue to fasten them to the painted canvas. Allow them to dry.
- After the LEGO Brick is completely dry, get ribbon and measure how long you want it to hang then cut the ribbon accordingly. Use the glue gun to fasten the ribbon to the back of the LEGO brick and it’s ready to wear!
With these costumes, it’s easy to grab any kind of pants, shorts, skirt, jewelry, sunglasses, hair bow in the same hue as your “brick” to accessorize your costume. I’m thinking of making a GLITTERY PINK LEGO BRICK this year to wear for Halloween! What do you think?
 I found a ton of cute, non-sweet treats like tiny notebooks, mini heart erasers, fun pencils, and a bunch of different Valentine’s stickers. (everyone loves stickers!) I love to give my students
 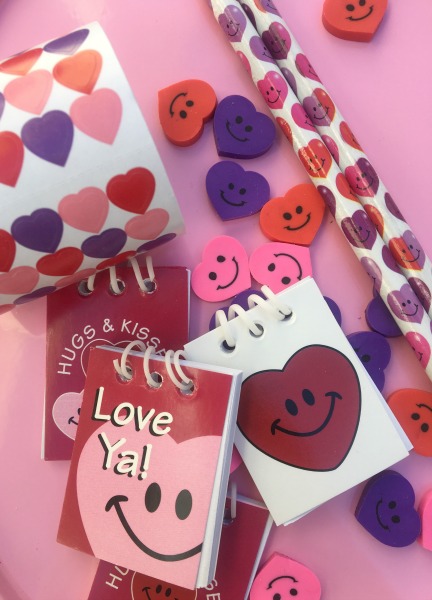 To make the Valentine’s pencils extra fun, I designed a set of purple, hot pink, and red printable “Happy Valentine’s Day” flags to add to them. I printed them on white cardstock so they were sturdy. (You can download these for free at the bottom of this post.)
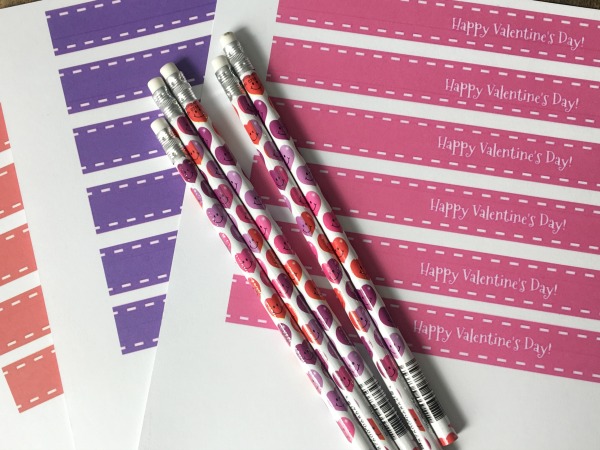
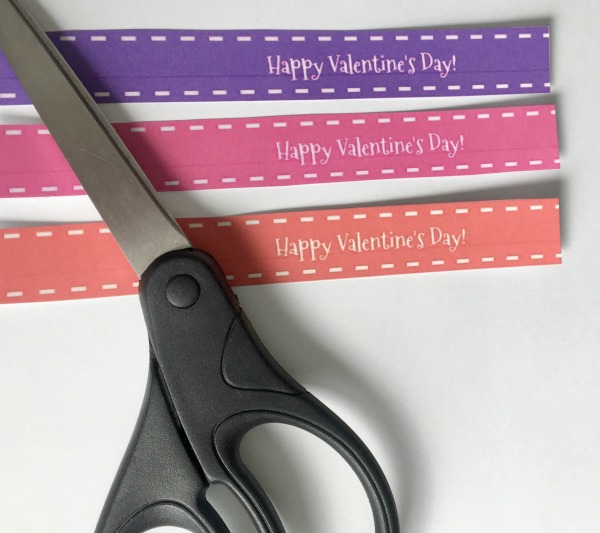 Fold them flag strips and apply pressure to the crease. Next, trim each one to a flag shape. Use a glue stick to fasten each one securely around the top of each pencil. To print out the FREE printable “Happy Valentine’s Day” flags, go
 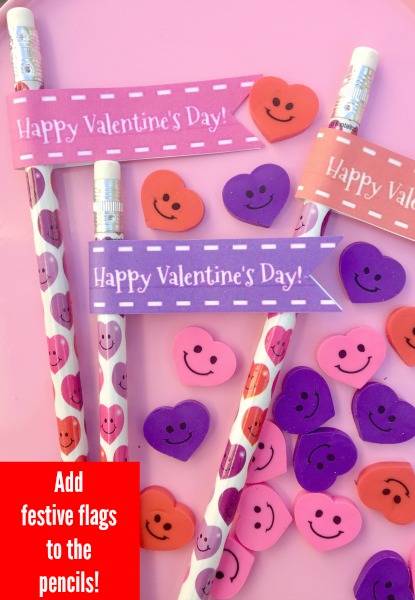 I made a non-candy “treat” bag for each of my students that included a Smile Face Valentine pencil with a flag on it, a couple of Mini Valentine Spiral Notebooks, a handful of Mini Smile Face Erasers, a couple sheets of Mini Heart Big Roll Stickers, and a Tic-Tac-Toe Valentine Sticker Card for each student. I stuck everything into a clear cellophane bag. and tied with some ribbon. I can’t wait to pass them out on Valentine’s Day! Do you send anything special for Valentine’s Day for your child’s classmates?
 It’s so hard to narrow down my choices but I’m thinking foil cards for our own
  In addition to their foil 2017 Christmas cards, here are just a couple other pictures of some of the other cute Christmas cards you’ll find on their site:
 To check out more of their cute Christmas cards, go
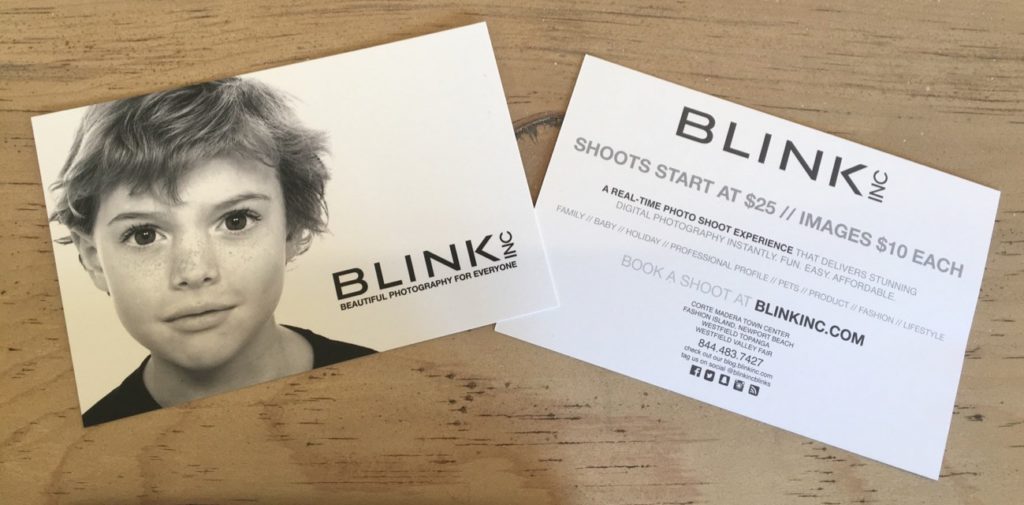
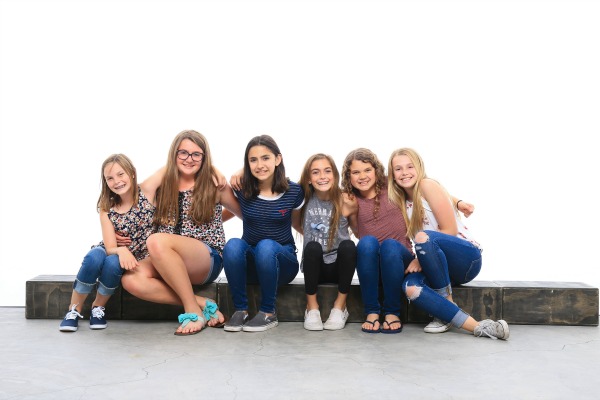
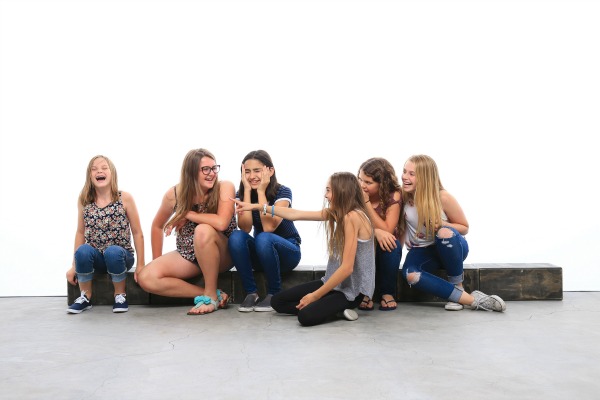
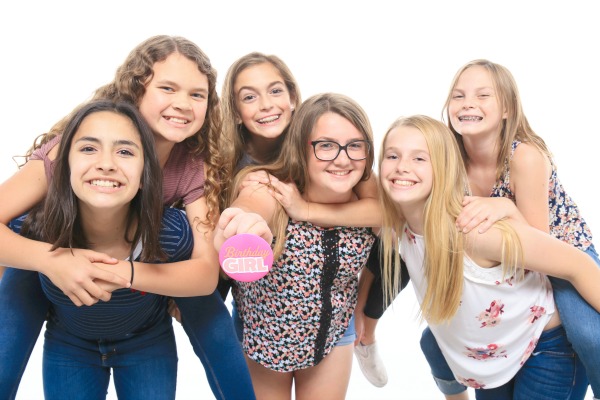 This year my daughter just wanted a “Girls Day Out” at the mall with her friends. I think they’re at the age where they want to be out and be seen. She requested lunch and shopping and “just hanging out”. I thought of something super fun to add to her day….I booked a BFF birthday photo session for the girls at Blink, Inc,! (She absolutely loved it when we visited last year.) She was ecstatic when I told her about the addition to our plans for the day!
 Blink, Inc. is a photo studio staffed with professional photographers that are ready to photograph you the moment you walk in. It was so easy to make this fit in with our party schedule, you just go online to their site and choose a time and date at the location that works best for you, and book an appointment to go into their studio.
 Blink, Inc.studio is already set up with an all-white, blank backdrop, giving you images that look and feel like a professional, editorial fashion shoot. The lighting is set up to make everyone look their best! (They even flashed out MY wrinkles!)
 The photographers at the studio are experienced and will work with you ,not only to make it a fun experience but also to assure you get the images you envisioned in your head. Our photographer talked with us a little bit before we started and we showed her some of the props we brought for the shoot and gave her ideas of what I was looking for.
 You’ll want to come into the studio with an idea of what you’re going to do because shoots go by very quickly. We brought tiny party hats with us, a “Birthday Girl” button, and some confetti, to use as props in some of the pictures. Our photographer, got a lot of cute shots though, most without props. I love that the girls were just dressed as their regular, everyday tween selves because their littler personalities really showed in the photos.
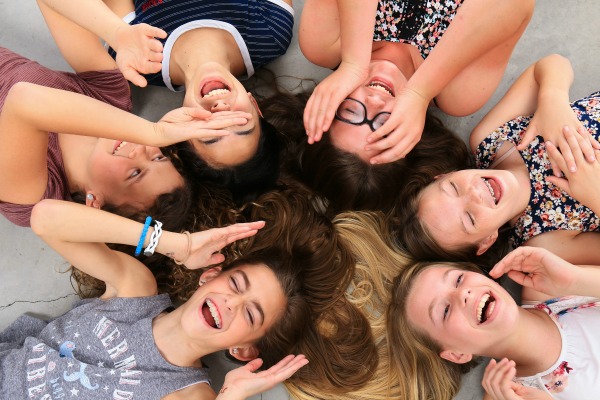
 Sessions at Blink, Inc can be scheduled for 10, 20, 30 minutes, or even longer, and start at just $25 for a 10 minute session. You’re able to see your photos as they’re shot, because Blink, Inc. offers a real-time delivery system. Pricing for images begins at $10/image with the option to purchase the entire shoot at a great “Buy All” price. Your images are delivered almost immediately to your computer or mobile device so you can view, download to share online and even print at home.
 Walk-ins are welcome but reservations are always encouraged at Blink, Inc.. To learn more about the different types of sessions you can shoot at Blink, Inc. or to reserve your own in-studio appointment, please visit
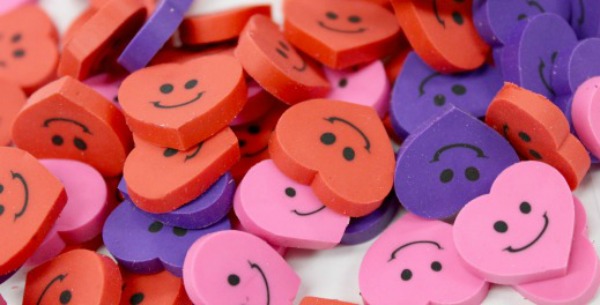
 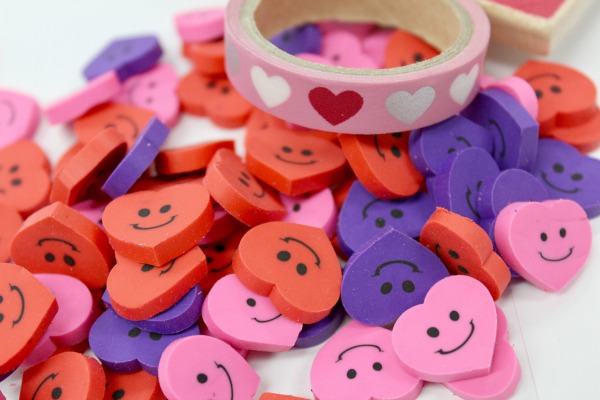 To create this fun Valentine’s Day patterning activity, I found the most adorable mini smile face heart erasers on the Oriental Trading Company site’s
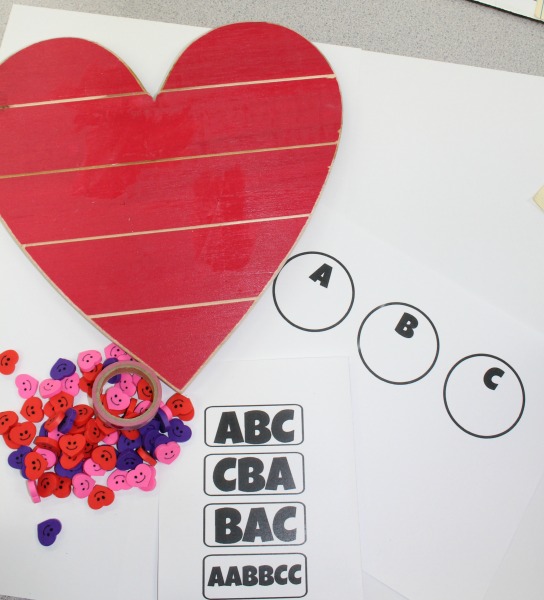
 Students can also just practice the patterning at their desks. Each student gets 3 circles, each one with an “A”, a “B”, and a “C” in the center, to create their “key”. They place a different colored heart eraser in each circle after they decide which ones they want to be each letter in their patterns.
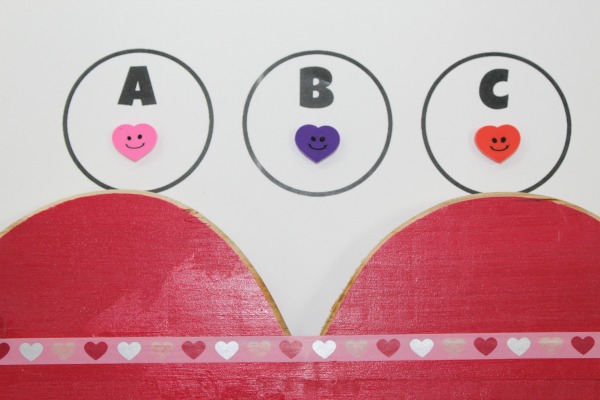 Then they place the rectangular pattern cards out on their desk. Each student receives about 50 heart erasers to work with and they create their own patterns. It keeps them pretty quiet for a short while, which is nice.
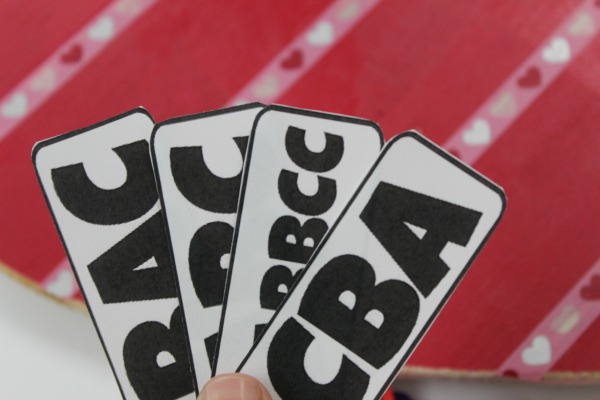 To switch it up, they can change around which color heart they place in the key and create new patterns. They LOVE doing this patterning activity!
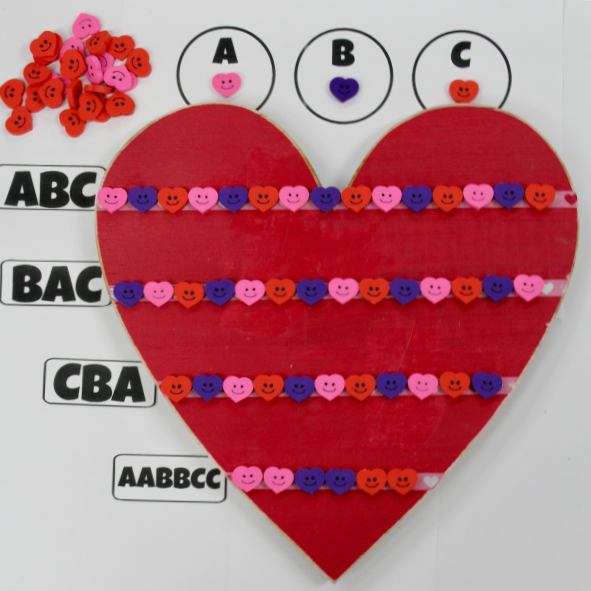 As an extension activity, you can also have students draw and illustrate their patterns on a piece of paper.

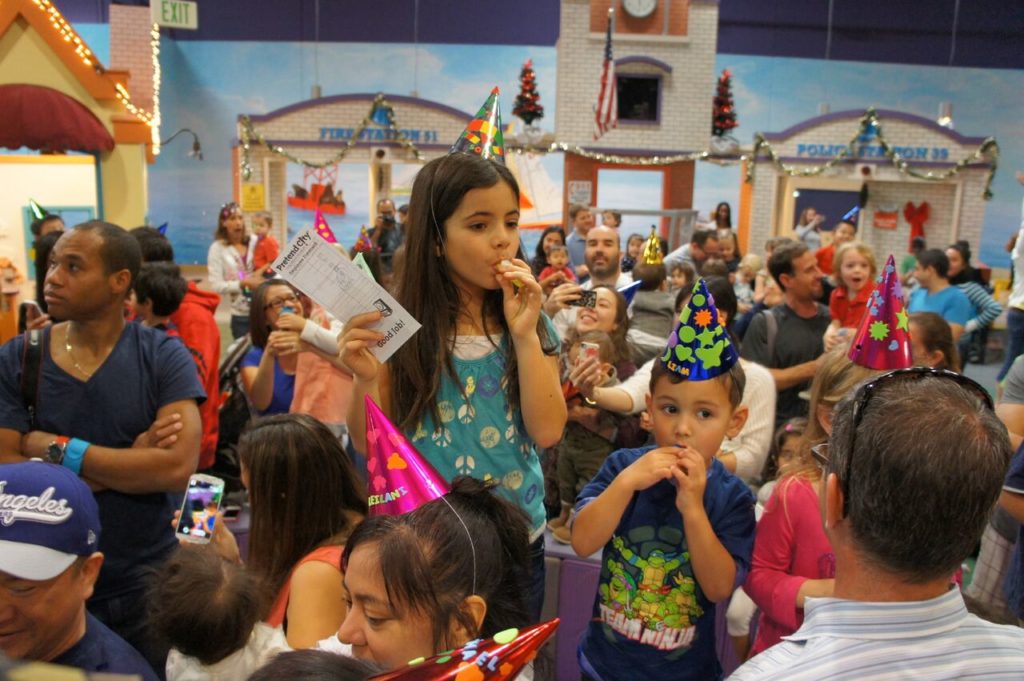 Children will be able to get in the spirit with crafts including DIY noise makers and party hats and a kiddie dance party, in addition to enjoying all of the regular fun at Pretend City Children’s Museum.
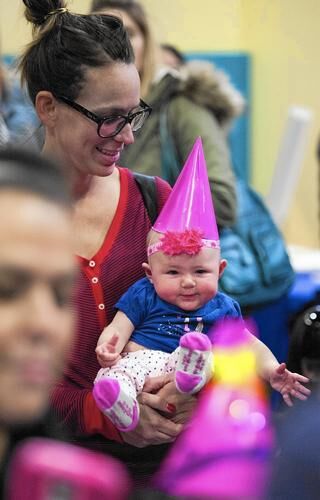 Join in all the family friendly fun at Pretend City this New Year’s Eve! Hope to see you there!
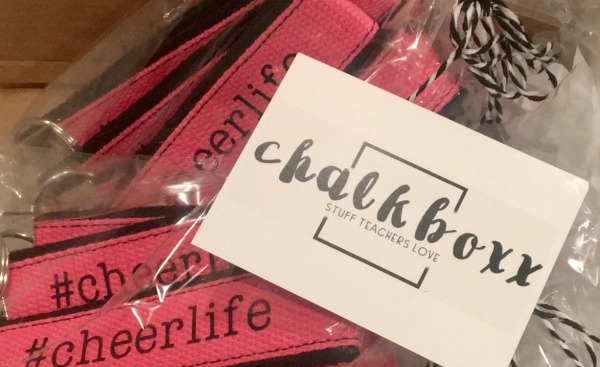 How adorable are these custom #CHEERLIFE keychains I had her make for my girls? I’m in love with them! You can pretty much customize these with anything you’d like them to say.
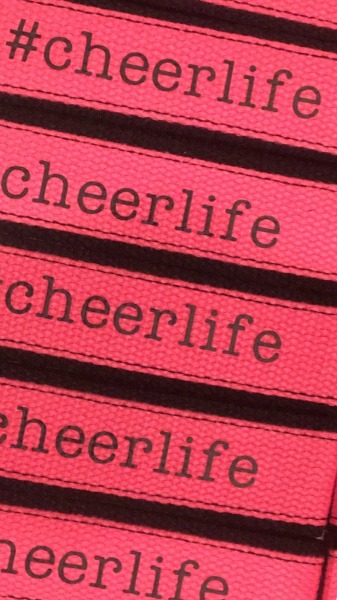 I wanted to attach some kind of encouraging, positive tag to the gifts as well, so I whipped up this little printable that says “The KEY to an amazing cheer season is TEAMWORK!”
 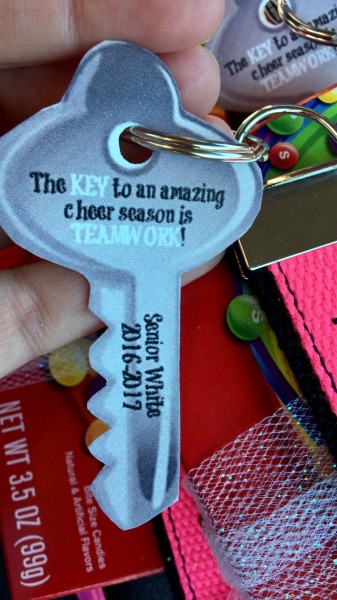 I also made a generic version so you can print it out
 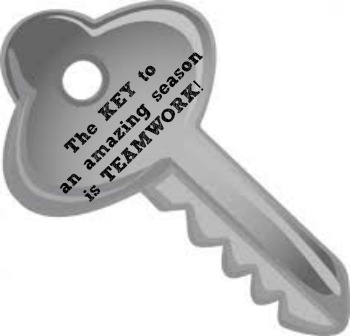 If you have time, you can even laminate them. I punched a hole in each one and stuck it on the actual keychain.
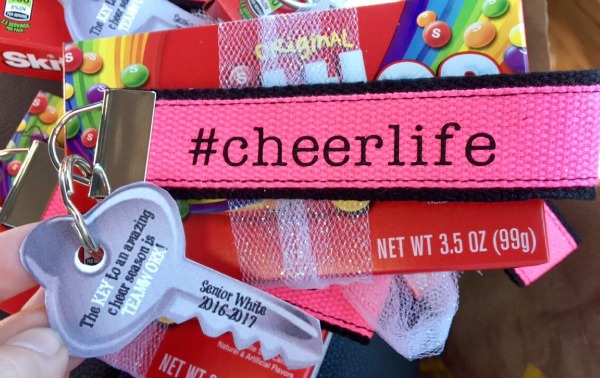 I grabbed theater-size boxes of Skittles and tied each keychain onto a box, using sparkly white tulle! Simple. Cute. Unique. Exactly what I wanted!
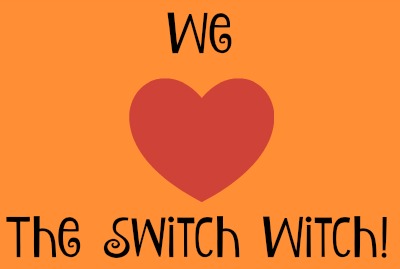
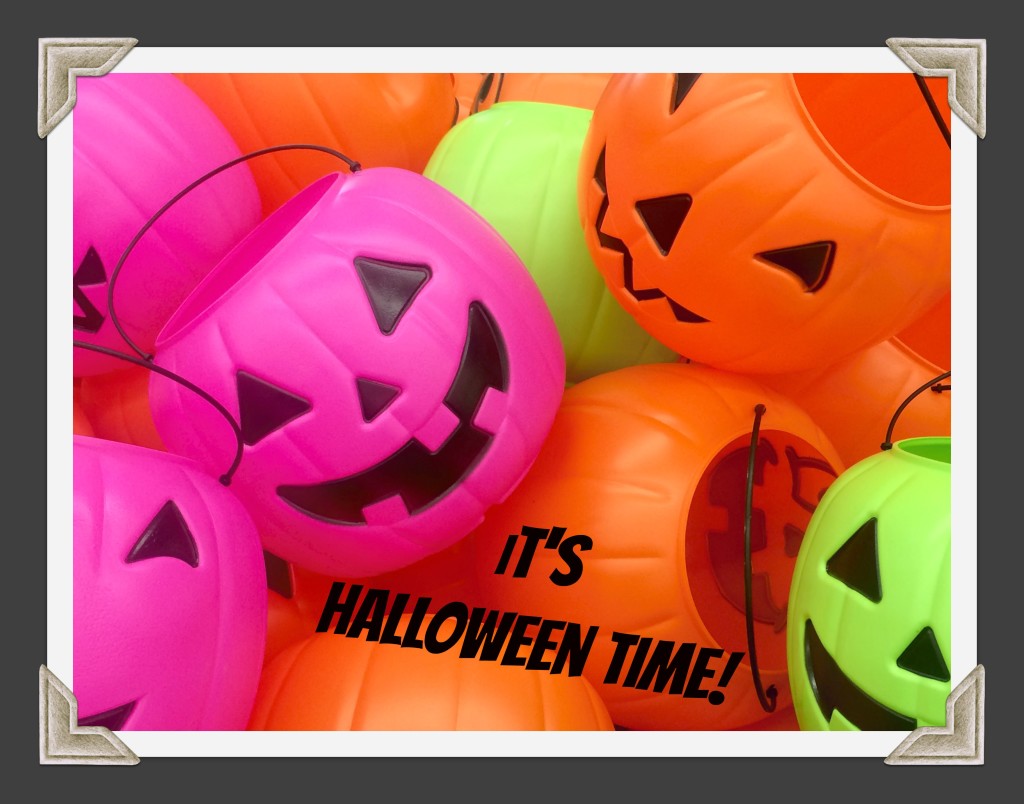 Don’t worry, The Switch Witch is a friendly witch and she will make your life so much easier. This time of year, kids everywhere are gathering way too much candy for their own good. Whether they’ve gone to Halloween parties or received goody bags from school, it’s all more candy than they should be eating. As soon as Halloween night hits, your home is going to be overthrown by even more sweet treats!
  The story of The Switch Witch is a fun, friendly one and a game changer for parents everywhere who are looking to get rid of their kid’s Halloween candy! It’s important to know that she is a friendly witch and a friend of The Tooth Fairy, Santa, and The Easter Bunny, so that’s how I first explained her to my daughter. She only visits during the first few nights after Halloween (including Halloween night).
  Kids get to pick out 10 pieces of candy and put them away somewhere safe. Then, they leave the rest of their candy out for The Switch Witch before they go to sleep. (Some kids even write her a nice note!) Later that night, when everyone is sleeping, The Switch Witch will come in and “switch” out their candy for a surprise!
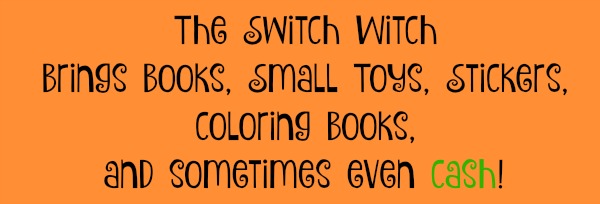 When kids wake up the next morning, they get so excited to see what she left them! We’ve done this for every year that my daughter can remember and it really saves what could be looked at as a lot of unwanted sugary treats from being ingested by your kids. Your pediatrician and your dentist will be so pleased with you! Happy Halloween!